Deploying Chooch Inference Engine on Edge Devices
Edge deployment checklist
The following steps will need to be completed in order to deploy Chooch at the Edge. See below for more details on each task. If you have any questions or need technical support, contact support@chooch.com.
Edge Device
An edge device should be allocated for this deployment, either bare metal or virtual, sized corresponding to the number of cameras and models to be deployed on this hardware. Once proper hardware is procured, Ubuntu 20.04 LTS should be installed with full Ubuntu updates applied.
Internet Connectivity for Edge Device
The edge device should have at least 10 Mbps or greater internet bandwidth for proper installation, configuration, and remote management as part of the Chooch deployment.
Local Network Connectivity to/from Edge Device
The edge device should have antialiased at least 10 Mbps or greater (depending upon camera resolution) local network bandwidth to each device adequate for proper ingest for edge inferencing.
Camera Device Camera device(s), matching similar specifications to other camera models used previously, to be purchased for the new site. The type of camera is subject to location of conveyor, mounting location, lighting, etc.
Chooch can help as needed. See below for optimized example of best practice Axis camera specifications:
 Ensure the camera is upgraded with the latest firmware, then proceed to configure the video stream settings for the new camera using similar Resolution, Frame Rate, Compression, P-frames, and Bitrate Controlvalues as shown below.

Chooch Device Configuration
Once the Camera Settings, Camera IP Address, Camera Authentication and RTSP Stream URL have been confirmed and validated using VLC, proceed to configure a new Device in the Chooch Vision Studio platform.
The Axis camera RTSP stream URL must be constructed in the following format, replacing <username>, <password> and <ip-address> with the actual values:
rtsp://<username>:<password>@<ip-address>/axis-media/media.amp
Note: Username must be all lower-case. Password cannot contain any keyword characters like @ / ‘ “
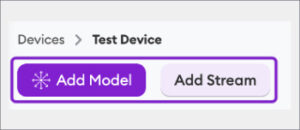
The new Device should be given a contextual name based on the location of the edge device on-site. Next, the validated Camera Stream(s) and Model will need to be added to this new Device.
Click on your Device and add Stream then Model(s).
Once the Model(s) have been attached to the Stream, click Analytics Settingsto activate desired classes and analytics settings.
Deploy Chooch Inference Engine to the Edge Device
Finally, the Chooch Inference Engine software will be deployed to the edge device following the steps on the setup guide.
Have your Chooch Enterprise API Key and Device ID(from the Chooch Cloud Portal) handy for this step.
Once the Chooch Inference Engine software is deployed, proceed to setup a new password and input the Device IDthat was pre-configured for the edge device.
Enable the following Alert Preferences and click Cloud Sync:
- Send only analytics data to Smart Analytics
- Send alert images to Smart Analytics
- Send alert videos to Smart Analytics
- Show alerts in the streams’ detail screen

Allow up to a few minutes for Cloud Sync to fully process until it says Sync Completed. The first time Cloud Sync is run will take the longest to download the initial model data. Once the model data has been downloaded, Cloud Sync generally takes seconds to complete. Cloud Sync must be run after any changes are made to analytics settings or alert preferences.
Configure Zones and Alert Rules from Chooch Vision Studio In order to draw zones or lines after deploying to a new site, you’ll need to first fetch a frame once the Inference Engine is running with a live stream.
From the local Chooch Inference Engine dashboard, click on the stream, then click Fetch Frame and click Send to Cloud
Log Into the AI Vision Studio.
Click on Devices > click on the specific Device > Analytics Settings > Zones & Lines > Draw Zone: 
After your desired zone(s) are drawn, click the X at the top right of the screen to Save & Quit. 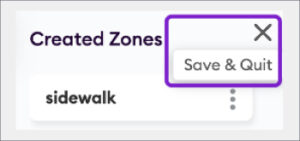
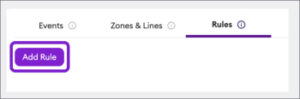
Next, click on Rules > Add Rule and follow the new rule workflow prompts to creating your desired rule(s). Once all desired zones and rules have been configured, switch back to the local Chooch Inference Engine dashboard and click Cloud Synca gain to fetch the configuration changes from Chooch Vision Studio.
Support
Please contact support@chooch.com , if you require technical support or have questions.
Related Articles
Chooch Inference Engine Setup Guide
Edge Device Setup Guide v5/v6 Chooch Inference Engine Setup Guide Within the dashboard, this guide will walk you through the steps to set up an edge device running Chooch AI models for NVDIA GPU’s and Intel Processors. The guide will explain how to ...Inference Engine installation guide
Inference Engine installation guide Within the dashboard, this guide will walk you through the steps to set up an edge device running Chooch models for CPU, NVDIA GPU, and Jetson Orin. The guide will explain how to install the Chooch Inference Engine ...Chooch API
Guide to calling the Chooch computer vision API Accelerate your computer vision deployments by taking advantage of the Chooch computer vision API. This documentation provides insight into how to call the API, how to provide an image for analysis, and ...AI Vision Studio Overview
Overview The Chooch AI Vision Studio helps users navigate through the platform faster and easier by providing access to all of the most important features. System Features ReadyNow Models Datasets Smart Analytics Latest updates How-to videos API ...ReadyNow Models
Overview Users have the ability to access Chooch's large number of pre-trained AI models allowing users to quickly apply these models for deployment. ReadyNow Models help users detect additional objects, faces, images, and text within a dataset, ...